atypdev | Post | My Recovery Partition Got in the Way >:(
<< go back
Fixing my drive by moving my recovery partition… WITH FORCE!
Disk Management Blunders
I own a super sexy Windows 11 system with a 1TB NVME SSD, which in the short-sighted scramble to dual-boot (and subsequently demolish) Manjaro: it became partitioned, split into two… Of course, as Windows tends to do, I was thrown a curve-ball which made re-uniting these two halves impossible:
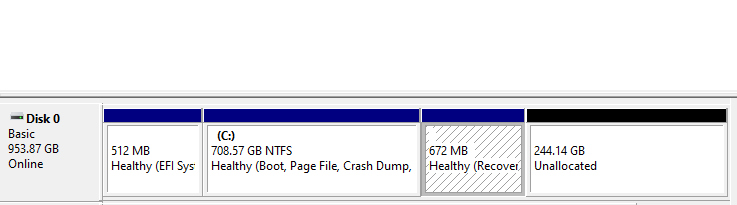
This, dear reader, is the tragic scene I was met with. Before you is a screenshot from my faithful Disk Management tool, and depicted is a recovery partition between NTFS and unallocated partitions… Romeo and Juliet style. Heartbreaking :-{
Alas!
There is, thank the lord above, a solution to my small abuse of this poor innocent 1TB NVME Samsung SSD…
Note: This does require an administrative prompt… but you knew that already you smart cookie ;-3
-
In order to expand my NTFS partition, we have to delete the Recovery partition. This is made fairly simple by the reagentc utility in Windows.

We use reagentc /disable to disable the Windows recovery environment, which moves the partition to a file called “Winre.wim” in C:\Windows\System32\Recovery.
-
Using diskpart, we’ll now force delete the recovery partition.
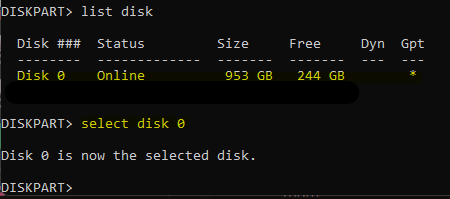
We’ll list our disks and select the one we want to modify. In this case, that’s my super cool 1TB NVME Samsung SSD ^w^
Next, let’s select and delete the partition:
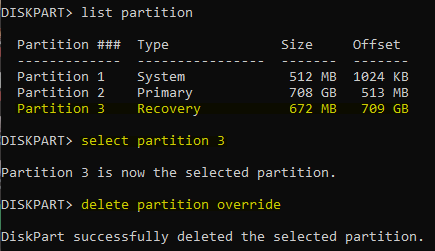
We’ll list the partitions using list partition, then select the Recovery one (in my case thats Partition 3) using select partition 3 and finally force delete it using delete partition override!
-
Profit(???)
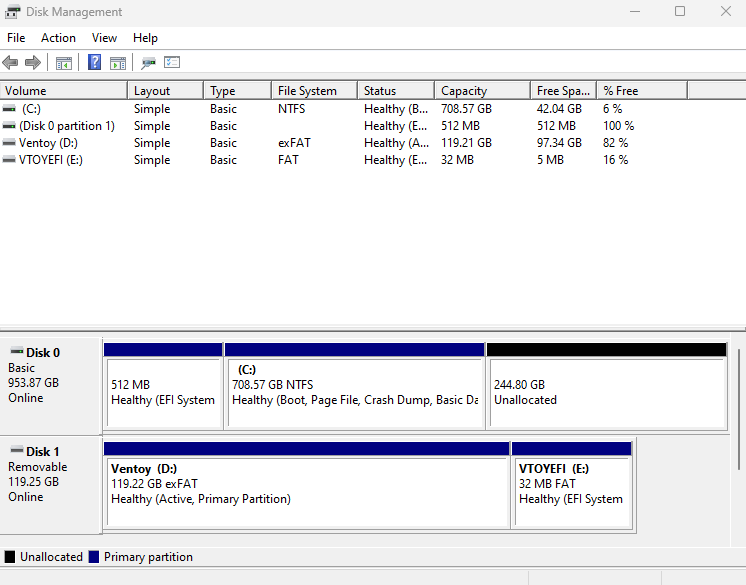
Hooray! As you can see the two long seperated partitions are reunited in harmony ~<3
But now, unfortunately, we should probably add back our recovery partition so our system can be safer </3
-
Extend the NTFS partition so there is about 1024 MB left of unallocated space, so we can re-add the recovery partition:

-
Now we want to create a New Simple Volume with the unallocated space.
Firstly we don’t want to assign this drive a letter:

You can name it whatever you want, I named mine “Recovowwy” xP
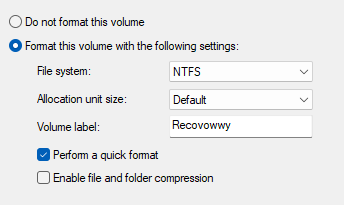
Perform the quick format!
-
Lets finish things >:3 Back in diskpart:
list partition- Select your recovery partition
- The partition IDs for recovery is “de94bba4-06d1-4d40-a16a-bfd50179d6ac”, which you can add using:
set id=de94bba4-06d1-4d40-a16a-bfd50179d6ac
- Add the gpt flag so Windows recognizes the partition:
gpt attributes=0x8000000000000001
-
Re-enable reagentc /enable’
Reunited at last!

Now our two seperate partitions may become one, and I may rest my head knowing the many 100GB+ games will no longer choke me out of my machine.
<3